
✅ Step 1: Identify Critical Assembly Points
Start by identifying parts of your process where human error is most likely—especially in:
Manual screw tightening
Repetitive fastening tasks
Variants in product models requiring different screws or torque settings
Use past defect reports and rework data to pinpoint hotspots for errors.
✅ Step 2: Define Torque Requirements
Collaborate with your design and quality teams to define the ideal torque values for different fasteners and joints. This ensures:
Correct clamping force
Zero damage to parts due to over-tightening
Reduced failures during vibration, transport, or usage
✅ Step 3: Choose the Right Poka-Yoke Tool
Look for tools that offer:
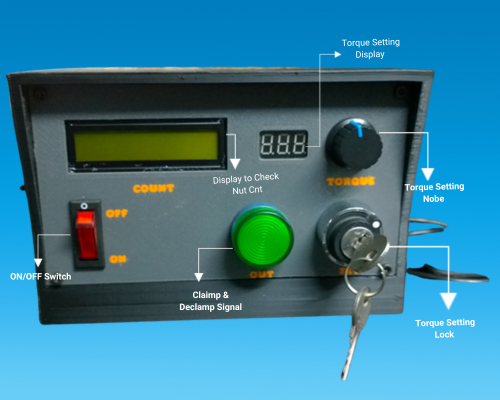
Set torque lock
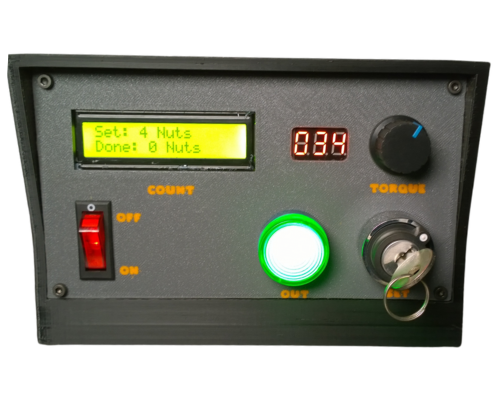
Screw counting (to ensure no screw is skipped or doubled)
Declamp detection (if a part is removed after tightening, the system should reset)
Error feedback via buzzer or light
Barcode integration for variant selection
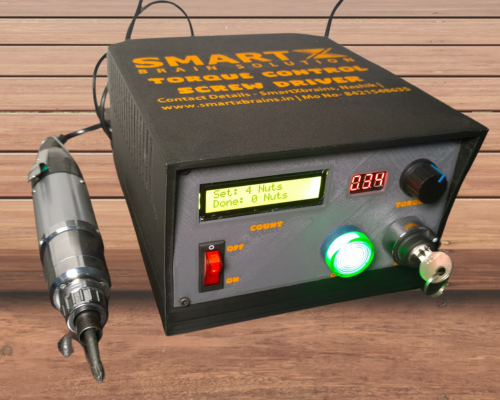
Smartxbrains’ Torque Control Electric Screwdrivers offer all of these features and are suitable for high-speed production environments.
✅ Step 4: Plan Installation & Workstation Design
Adapt your workstation layout to accommodate the tool’s wiring, controllers, and display modules. Ensure:
Comfortable access for operators
Clear visual indicators for tool status
Positioning of barcode scanners if needed
✅ Step 5: Train Your Operators
Even with automated tools, operator training is key. Train them on:
Correct handling of the tool
Reading torque completion signals
What to do in case of a missed screw or alert
Variant scanning process (if using barcodes)
✅ Step 6: Test Before Full-Scale Deployment
Start with one workstation or assembly line. Monitor:
Torque consistency
Screw count accuracy
Time per assembly
Downtime due to errors
Fix any integration issues before scaling up.
✅ Step 7: Integrate with Quality Systems
Ensure the system logs:
Torque completion data
Variant ID from barcode scans
Screw count per cycle
This can help with ISO audits, quality traceability, and data-driven decisions.
✅ Step 8: Perform Routine Maintenance & Calibration
To keep your poka-yoke system effective:
Calibrate torque settings regularly
Replace worn screw bits
Check sensors and controllers monthly
✅ Bonus: Set Up Error Notifications
Advanced systems like those from Smartxbrains allow connection to:
Alarm buzzers
Tower lights
Central monitoring software
This helps your supervisors immediately act on errors, reducing downtime.
Conclusion
Implementing Poka-Yoke torque control tools with screw counting and declamp detection is a game changer for factories focused on quality, speed, and customer satisfaction.
Smartxbrains tools are already trusted by factories in Nashik, Pune, and industrial hubs across India.
Ready to upgrade your factory with reliable torque tools? Contact us today for a demo and consultation.